It’s an amazing feature by Apple to help share files with nearby devices, and of course, you can do that wirelessly. Unlike some other means of file transfer, using Airdrop won’t affect the file quality, and you’d also be able to transfer it faster than usual. ⏱️ The reason Airdrop is so popular, and you keep hearing about it, is the fact it makes things so convenient. I would like to believe users of iOS and macOS do not use any other way of transferring files apart from Airdrop when the devices are within close range. Now, you might want to consider changing your Airdrop name when multiple iOS/mac users in your household share the same name. The reason is that it can leave you confused about which one is the right one while sending files because multiple devices of the same name keep popping up. Also, if you already have a name you don’t like, it makes sense to change it to something new. If you’ve been wondering how to change Airdrop’s name, this is the perfect post. Follow the simple steps, and you’re good to go.
How to change Airdrop name on an iPad
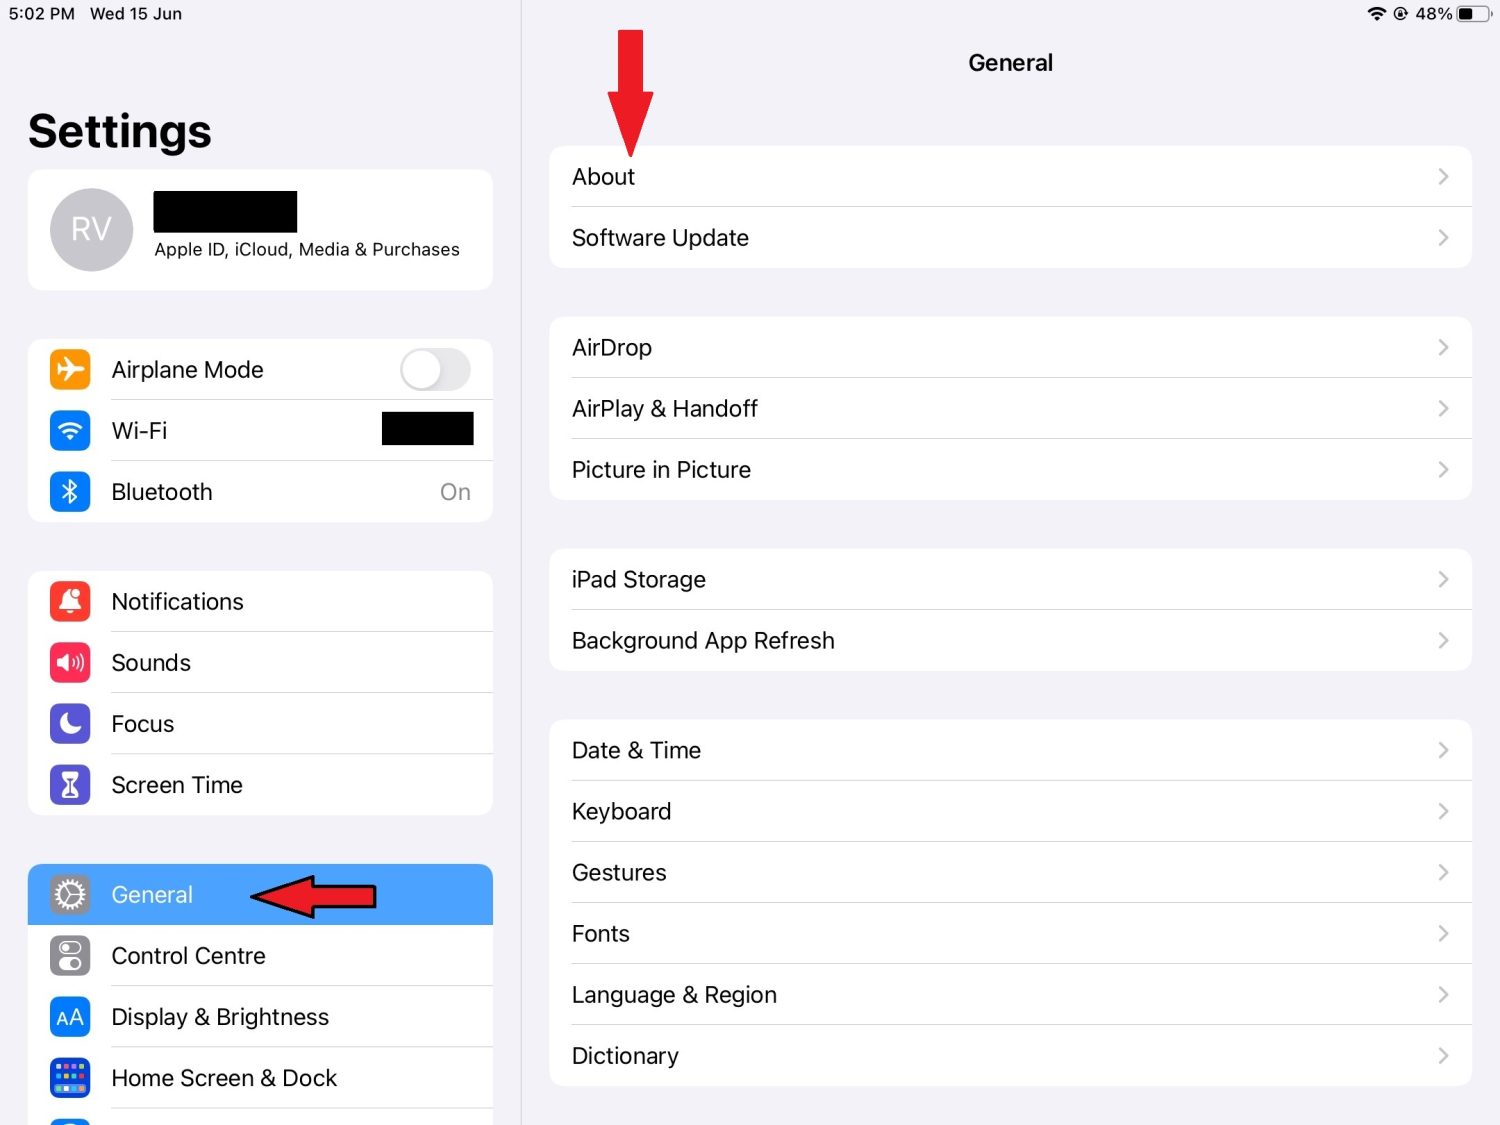
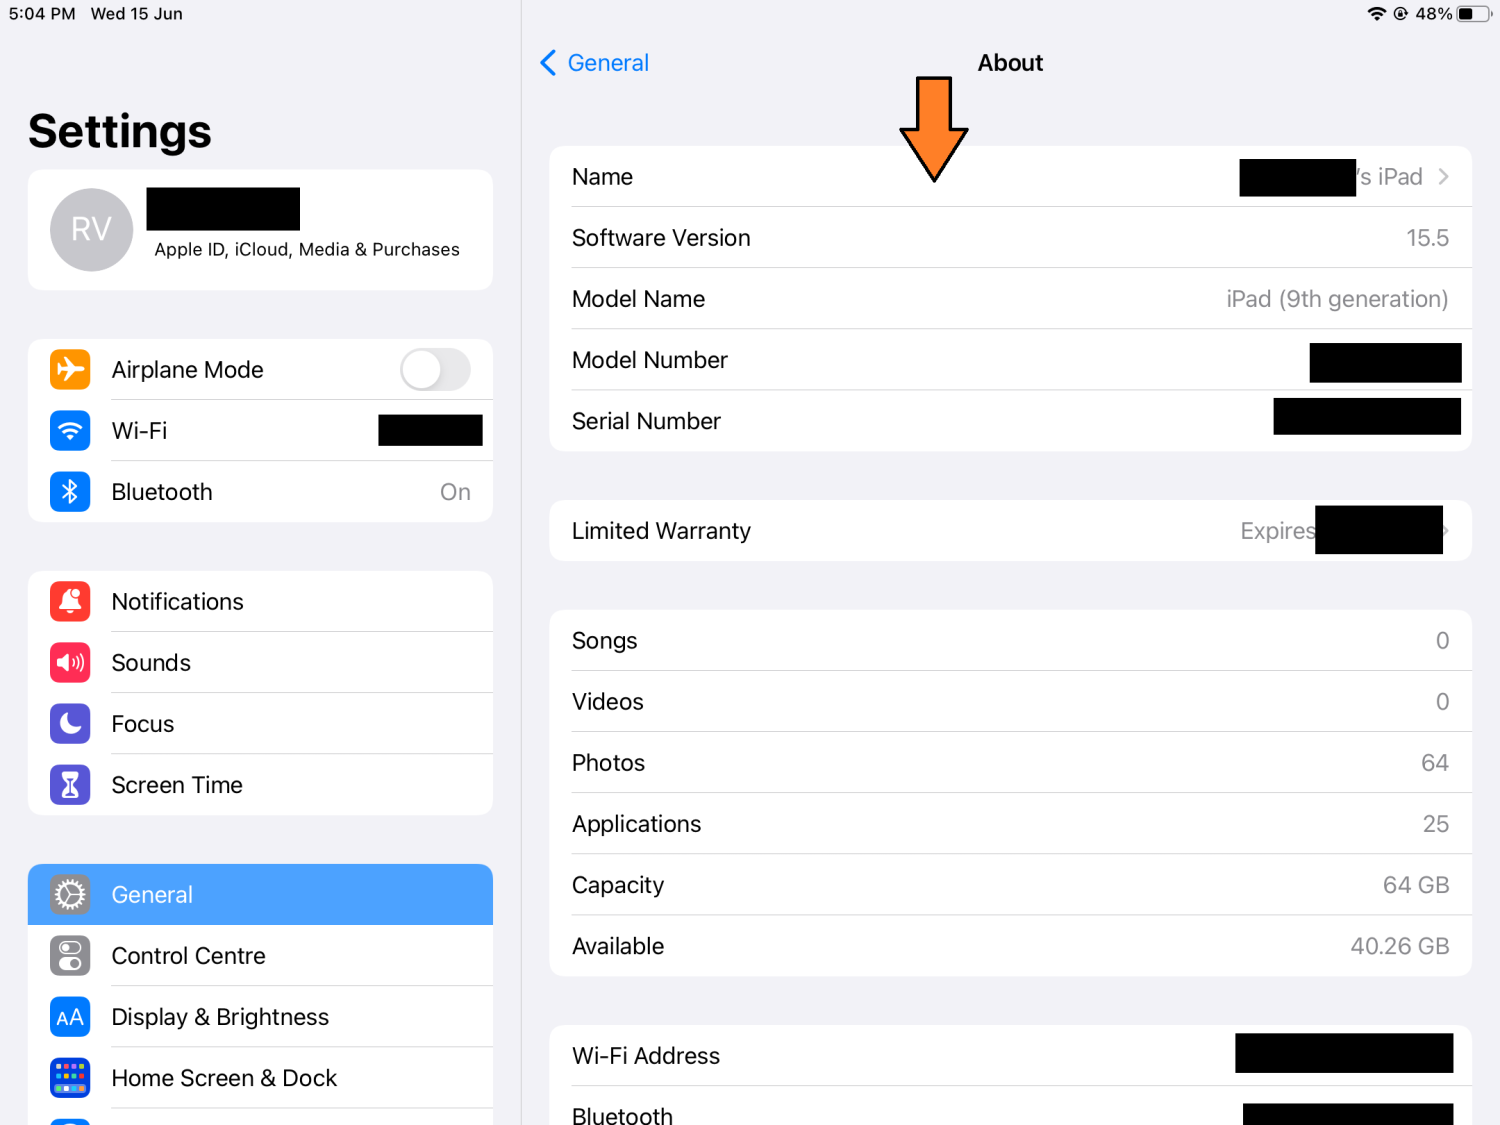
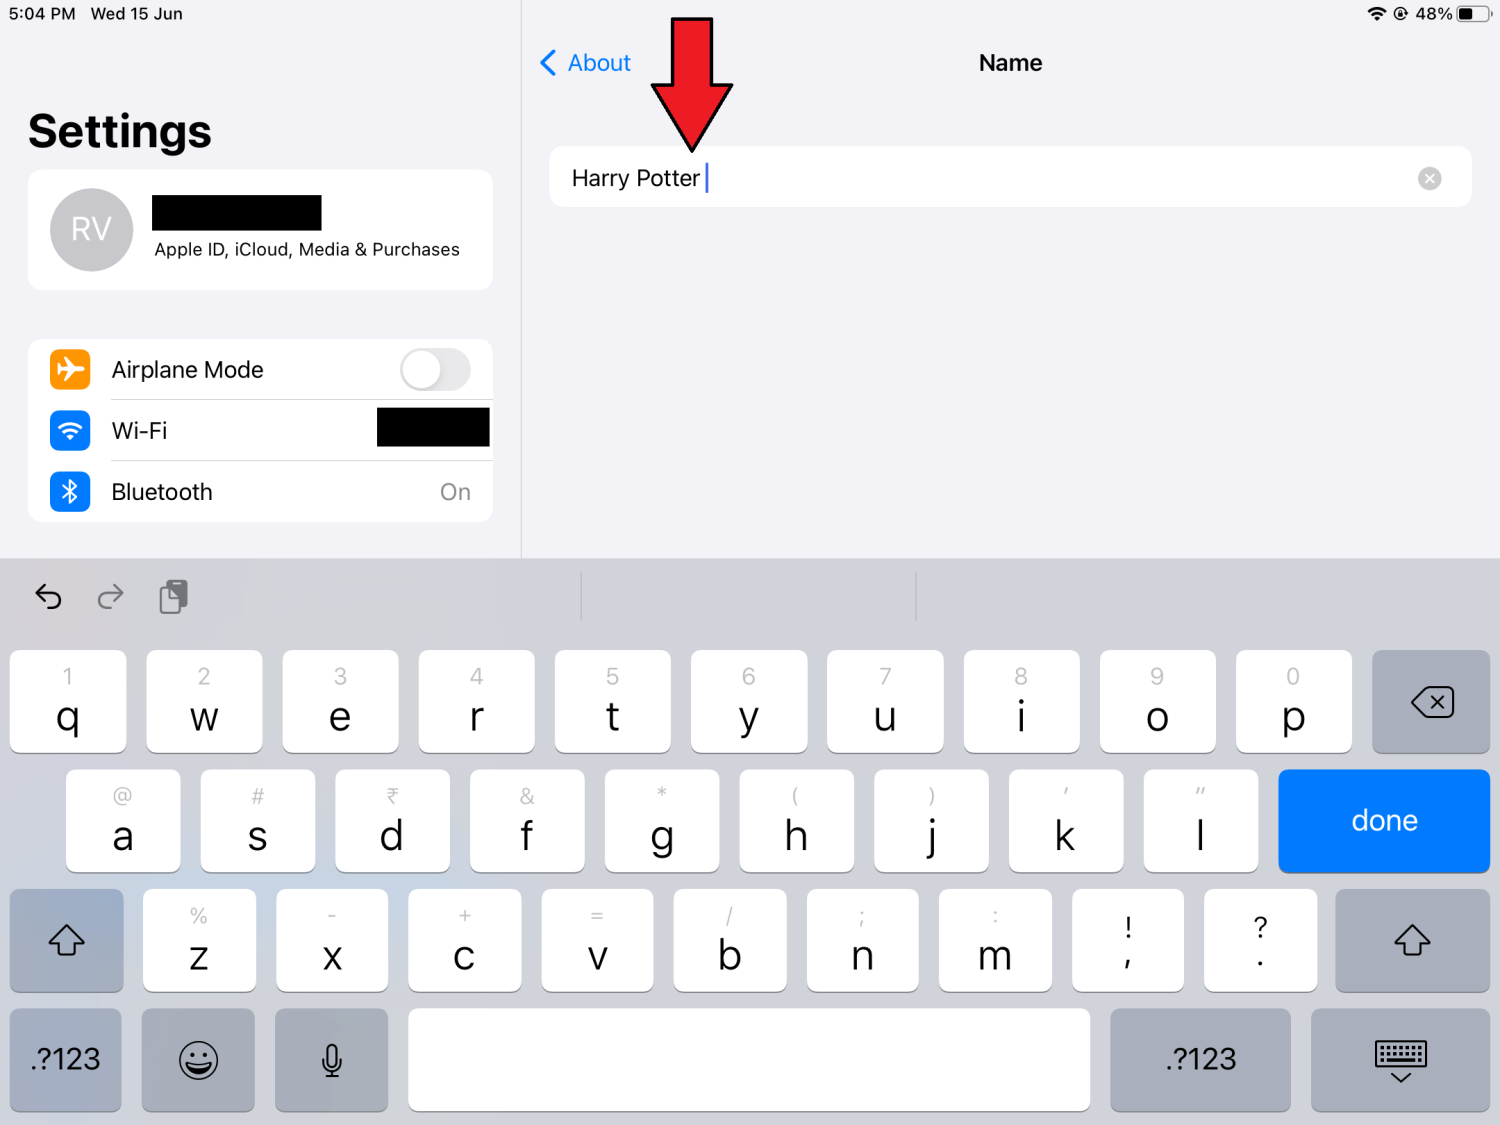
The process for changing your Airdrop name on the iPad is pretty straightforward and doesn’t take more than a minute. Check the screenshots below. Step 1: Go to Settings, tap on ‘General’ and then ‘About’. Step 2: Tap on Name. Step 3: Type out the new Airdrop name. Step 4: Tap on ‘Done’ to finish the process. Now, when people are about to share files to your iPad, your new name will be displayed.
How to change Airdrop name on iPhone
Changing the Airdrop name on your iPhone has to be done from your Contacts app rather than from the Settings. Here are the steps: Step 1: Tap on Contacts from either the dialing menu or homepage. Step 2: Tap on your contact card that has your name on it. Step 3: On the upper right corner, tap on “Edit”. Step 4: Type out the new name, and tap on “Done” once you’re done. Doing these steps are enough to change your Airdrop name on your iPhone. Keep in mind that it might take a while for the new name to reflect.
How to change Airdrop name on Mac
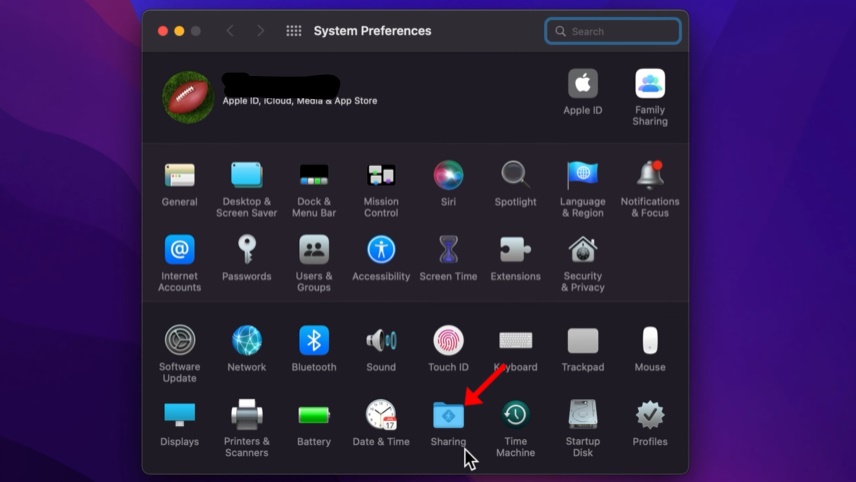
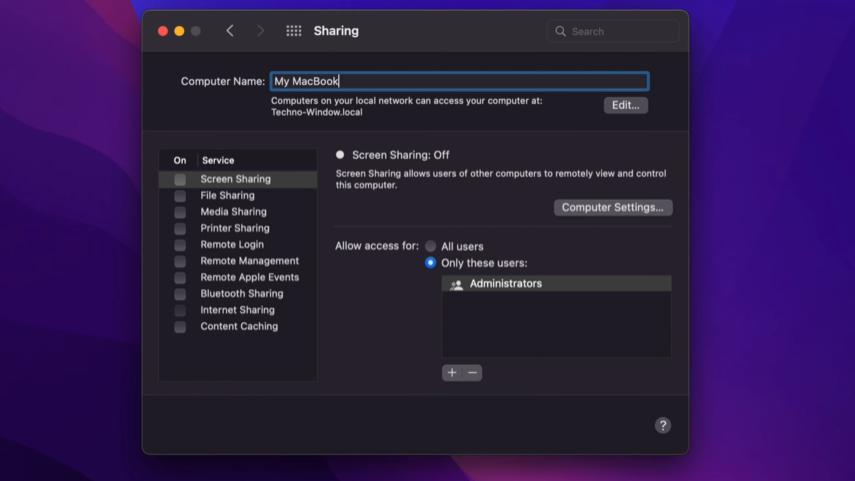
Just like iPhone and iPad, changing the name on your Mac is not difficult and won’t take a lot of steps. Step 1: On the top left of your screen, click on the Apple icon. Step 2: Click on System Preferences. Step 3: Select Sharing. Step 4: You’ll see a screen like this which will allow you to enter the name of your computer. Go ahead and change the existing one to the new one. Step 5: Click on the red X on the top left to save the changes. Your Mac computer will start displaying this new name on the Airdrop and in other places.
What to do if the new name isn’t updated or is not discoverable?
There may be instances when the newly updated name doesn’t appear even after following all the steps. In that case, you can try turning the device off and then turning it back on. Most of the time, doing this fixes the issue. You could also try doing the steps again to ensure you did it correctly. ✔️
Conclusion
The steps for changing your Airdrop name on all the 3 Apple devices are straightforward. I hope this tutorial will save you from all the confusion you’d have had because of the same Airdrop names while transferring files.


